Wednesday, May 25, 2011

NURBS revolve


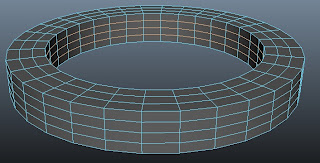
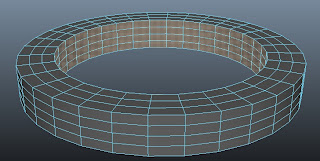
Through this tutorial, I learnt that curves are the basis of all NURBS surfaces. Changeing the input values can change how the shape of your object looks. Changing endSweep value changes the angle that the curve is revolved around the y axis. The curves that made up the surfaces of a NURBS is called "isoparm". I also learnt that we can change the axis for the revolve and also the pivot(centre point which the revolve is performed). I aso learnt that changing the values of the axis of rotation will not have any effect on the shape.

Tuesday, May 24, 2011

Spiral modelling


For this exercise, I learnt how to create a spiral using the CV curve tool. The exercise is pretty simple and self-explainary. First i need to create a curve , create a nurbs circle, extrude it and lastly, rotate it the way i want it. The only problem that I encounter is the snap to grid tool. It doesn't work like how it was supposed. I keep re-doing 2-3 times but I still can't get it.

Monday, May 23, 2011

Introduction to curves

EP curve tool
Top view
Curve point mode(adding of knot)
Degree 1
Degree 5
Comparisons of degree 1 and degree 3
Pencil curve tool


For this exercise, I learnt how to create different types of curves by using different edit curve tools. I learnt how to use the EP curve tool and the control vertex mode which we can move the vertices of the curve so as to change the shape and angle of the curve. I learnt that i can use the Curve point tool to add a knot(edit point) on the selected curve. We can also change degrees of the EP curve tool to change the flexibility of the curve. For example: for degree 1, the result of the curve would be sharp edged;no smoothness. The smoothness of the curve gets higher as the degree of the curve gets higher. I also learnt about the Pencil curve tool. The tool allows us to create a curve simply by dragging the mouse on the grid; it captures the mouse positions and set the control points after every curve we made. I find this tool very convenient to use. The exercise also showed me how to minimise the number of the control points on the curve if there are too many by using the Rebuild curve tool.

Cardboard modeling


For this exercise, I had learnt how to model an open cardboard box. I learnt how to create and move a pivot point using the rotation tool. I also learnt how to pick-walk and smmoth the cardboard box.I did not encounter any problems with this exercise. I believe that scaling the vertices is also a very important step to create the cardboard box. I think this exercise is very enjoyable.

Sunday, May 22, 2011

Polygon Selection

Backface culling


Paint selection tool


Grow selection region


Strink selection region


"Select contiguous edges", "Converting selection to faces" and "Create selection set"


For this lesson I learnt a lot of different techniques on how to select different components of the object. I find backface culling very useful as it only selects faces that are visible. This way, I would not accidentally select faces that I do not want to select. The paint selection tool is my most preferred way of selecting components as it is the most effortless way for me to select the faces that I want; I do not have to click one-by-one. Whenever I drag and click the faces i wanted to select, I always ended up selecting those faces that I don't want accidentally. This solves my problem and it is very convenient. I also learnt how to use the grow/shrink selection region tool. I find that very useful too, especially when I want to select a small area of the object. There are even hotkeys that I could use without clicking the menu bar for it. I also learnt about the 'select contiguous edges' tool. It selects the faces that are nest to the ones already selected. After that, using the 'convert selection to' button to 'faces'. This way, all the edges that were selected becomes selected faces. Lastly, I also learn to create a 'quick selection set'. It helps me to select the components and store them for easy retrieval later.

P.S: previously I did not know that screenshot images must only contain the object and not the whole interface. From this post now on, I'll show only the object.

Gear exercise


This exercise i learnt how to model a gear and also some modeling techniques such as using the face conponent in order to extrude faces, to create a gear.