Friday, July 1, 2011

12 principles of animation

Exercise 2

Anticipation

The girl on the left is anticipating for the girl on the right to throw the thing to her.

Slow in and slow out

The girl moves from squating down to standing between two extreme position.


Squash and stretch

The wallet changes shapes as it hits the wall and touches the ground.

Follow through and overlapping action

As they do the chicken dance, each part of their body moves at a different pace.

Straight ahead action and pose to pose

The girl's size becomes bigger and bigger as she runs to the camera.

Exercise 3

Follow this link to see these 6 different principles of animation - Anticipation, Arcs, Follow through and overlapping actions, Squash and stretch, Secondary action and Exaggeration
=>   www.youtube.com/watch?v=46hBd18ZYMo&feature=related

Explanations

1)Anticipation- The guy in the video is getting ready to jump over a distance. The viewer will not know how far he can jump.

2)Arcs- The guy in the video is moving his arms by rotating his joints to throw a ball forward. Arcs are natural actions/movement.

3)Follow through and overlapping actions- His arms and legs are moving at different speeds and anglea all at the same time. His arms and legs are still moving when he stops moving and stays in place.

4)Squash and stretch- His muscles are changing shape and also returning to original shape as he tries to pick up the dumbell.

5)Secondary action- His head is moving upward while his hands are pulling the dumbell up.

6)Exaggeration- The dumbell was bent out of shape in the end which is quite exaggerated.

Friday, June 10, 2011

Self Critique of Project 1


I think my final model was quite successful because it matches closely to the original object and my intial conception. I'm very pleased with the body of the toy cow as I think it is the best modelled. I am very happy with the overall outcome. I think the head of the model needs some improvement as it needs to look more smoother like the real toy cow. The tail of the real tail is a little curled upwards but my model's tail is modified slightly curling down.

Research of project 1


I researched on how to model a head of a cow by using a tutorial based on 'Maya At A Glance'. The shape of the head is entirely different but I still used it as reference. I find it was rather helpful in teaching me where to start from. First, I created a polygon cube. I used smooth tool to smoothen out the sharp edges of the polygon cube. I also extrude, pull and scale so as to create ears for my toy cow. I used the sculpt geometry tool to smooth the vertex position of the model. I also learnt how to make the cow head symmetrical by deleting one side of the model by using the mirror geometry tool in the Polygons menu. It saves time and effort too. Those were similar steps that I think could be implemented in my cow toy model.

Thursday, June 9, 2011

Tuesday, June 7, 2011

Story and shape of project 1

Story
I decided to model a toy cow for my project 1. The story is about a rat racing around a track on a mousetrap car. The toy cow is lying in the middle of the track and the mousetrap car is heading towards it in blazing speed. The rat who is trapped in the car, struggled frantically after realising he is heading straight towards the toy cow. To no avail, his constant struggles was useless, he eventually crashed into the toy cow. The car bounced off the track and fell on to the ground. Due to the impact, he broke free of the grasp of the mouse trap. He scurried back to his mousehole before anyone notices.
Shape
The toy cow consist of its head, body and tail. The toy cow does not have any eyes but it has a nose and ears at the top of its head. Its surface is rather smooth. Extrusion, bevelling and Cv curve tool and moving the vertices can be used for creating the model. I find the head a bit difficult to model but I will try my best.

Sunday, June 5, 2011

Wooden block materials


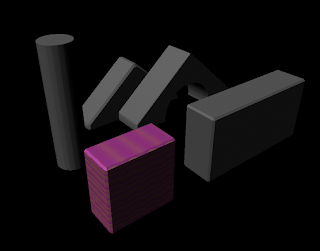
For this exercise I learnt how to apply new materials to the block object. I learnt that we can change the texture and color of the materials. I must link the node to the block so that grain stays with it in the current orientation when the block is moved. I also learnt how to use hypershade to create and edit connect nodes, textures, lights, rendering abilities and special effects. For example, duplicating the material of a block and changing its color and lastly, relink the right nodes to the right object. I also learnt how to change the settings of the render by using the Display Render Settings. I also learnt how to put a light on the scene, in order to brighten up when you are rendering.

Intro to Materials


For this exercise, I learnt how to apply textures on the object and also how to render it.